


I recently signed up to participate in the #2Articles1Week writing challenge in order to share my knowledge and learnings while improving my technical writing skills alongside. The challenge is being organized by hashnode in order to encourage writers practice writing standards and also become consistent at writing. You can signup for the challenge if this sparks an interest over here
As a data scientist, data analyst, machine learning engineer or any field related to Artificial intelligence and data analysis, jupyter notebooks are one of the major tools you would need in order to carry out your day-to-day activities either as a developer, research scientist or any of the roles mentioned earlier. A jupyter notebook is basically a development environment(IDE) where you can run python codes in cells, perform visualization as it combines text in form of markdown, coupled with displaying images all in one place in a very interactive way. Guess where all of those tasks are being performed ? yea, you guessed right, its all in a browser. And what other browser do you use other than chrome ? That's where chromebooks come into the picture. In this article, i'll be going over a walk-through on how to get jupyter notebooks running inside of your chromebook.
What are Chromebooks ?
Chromebooks are laptops with ChromeOS running inside of them, they always contain most of your favourite apps like Google docs, Youtube, Chrome, Gmail, and Google drive which are somewhat like extensions running inside of the chrome browser making it lightweight. You can also sync files from your google drive and work on them without having to download those files, the changes would automatically reflect. Also did i mention there's the playstore where you can download and run android apps like Whatsapp and friends. One of the reasons i enjoy using the chromebook is it's portability, long battery life, SSD for faster processing,the cool features features being rolled out by the ChromeOS team including the Linux(Beta) sometimes called Crostini and the amazing UI.
Steps
- Set up Linux (Beta) on your chromebook
- Download && Set up MIniconda
- Uninstalling Miniconda
Set up Linux (Beta)
Linux (Beta) is a terminal interface that allows you run bash commands, IDEs and code editors on your chromebook. Its a feature that allows developers run their favourite editors alongside ChromeOS default apps, giving developers ability to setup a development environment and dev tools. The most interesting part is that the Linux (Beta) is being run inside a contaier, thanks to Antonio Lo Fiego (He/Him) for a simplistic article on introduction to containers and docker for a noob you can check out the article here.
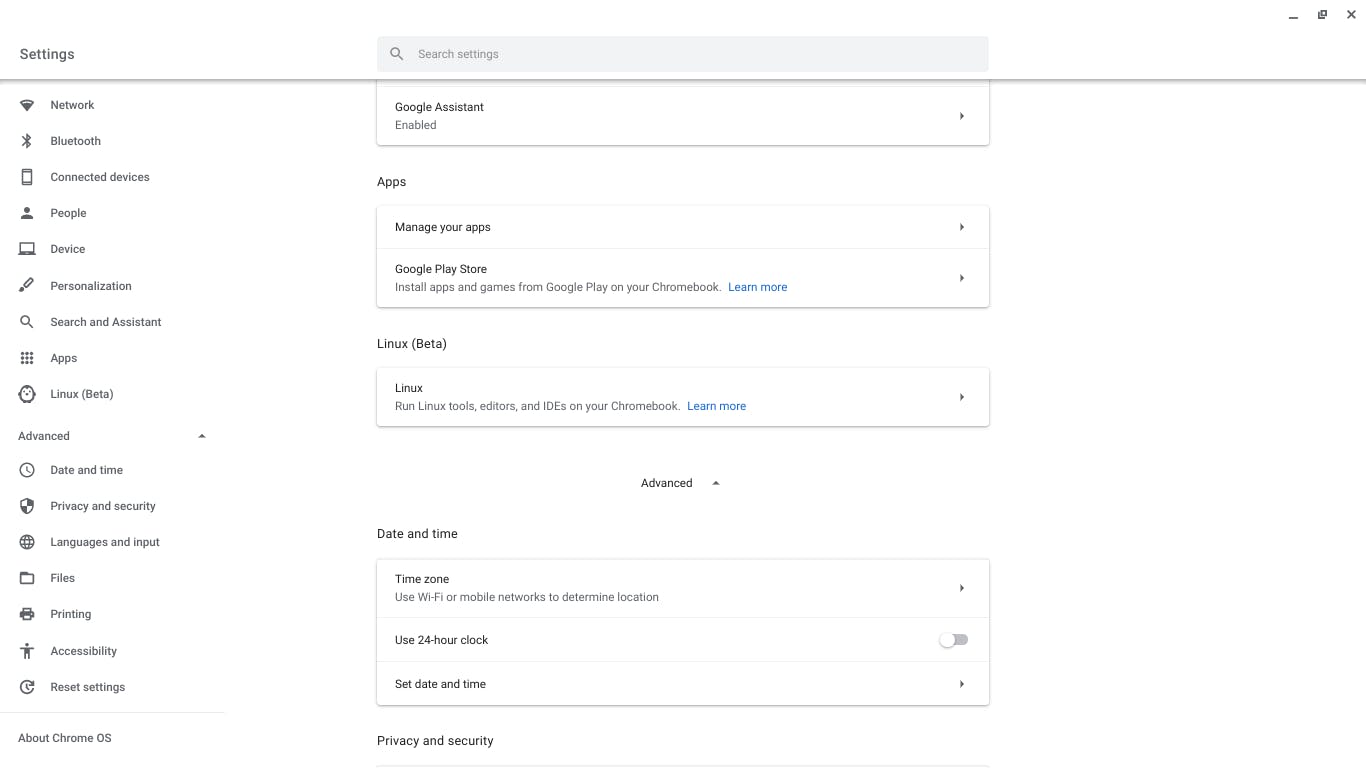
To set up Linux on your chromebook, sign in to your chromebook and navigate to settings
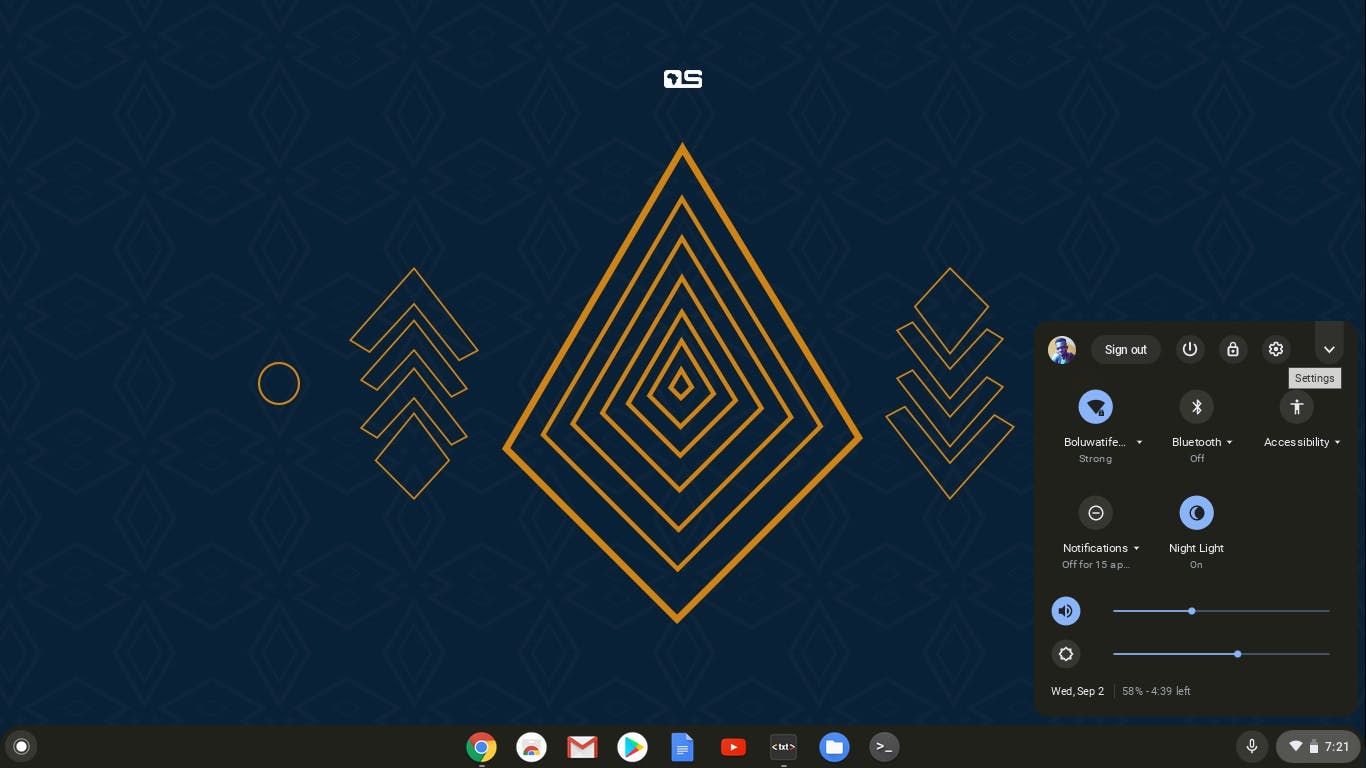
Scroll down to Linux(Beta) you should see a turn on button by the right, its not available in the image below because i already set up mine. The setup is quite straight forward, all you need is to follow the prompts and in few minutes, the setup should be done
 If everything goes well, open your launcher and you should see the terminal available amongst other apps. You might want to drag and pin it to the dock for easy access.

You can always check here to learn how to configure your environment for web flutter and android
Note: The Linux(Beta) is still being improved, you might face issues while setting up some other dev environments.
Download && Set up miniconda
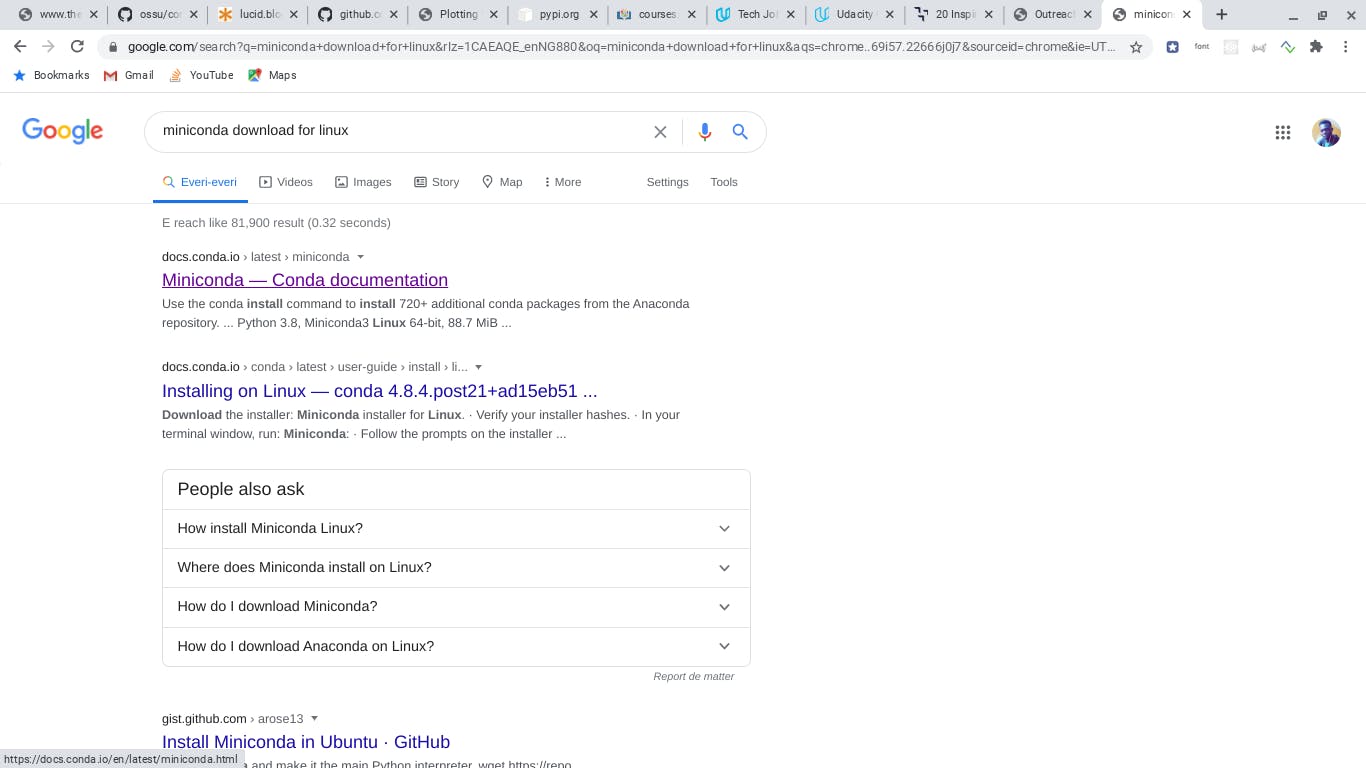
Miniconda is a lightweight version of Anaconda that includes python, conda and other libraries that they depend on like pip, zlib and the likes. Miniconda allows you run conda install package_name commands which installs packages from the Anaconda central repo. open up your browser and type "MIniconda download for linux" and click on the first link of the search results.
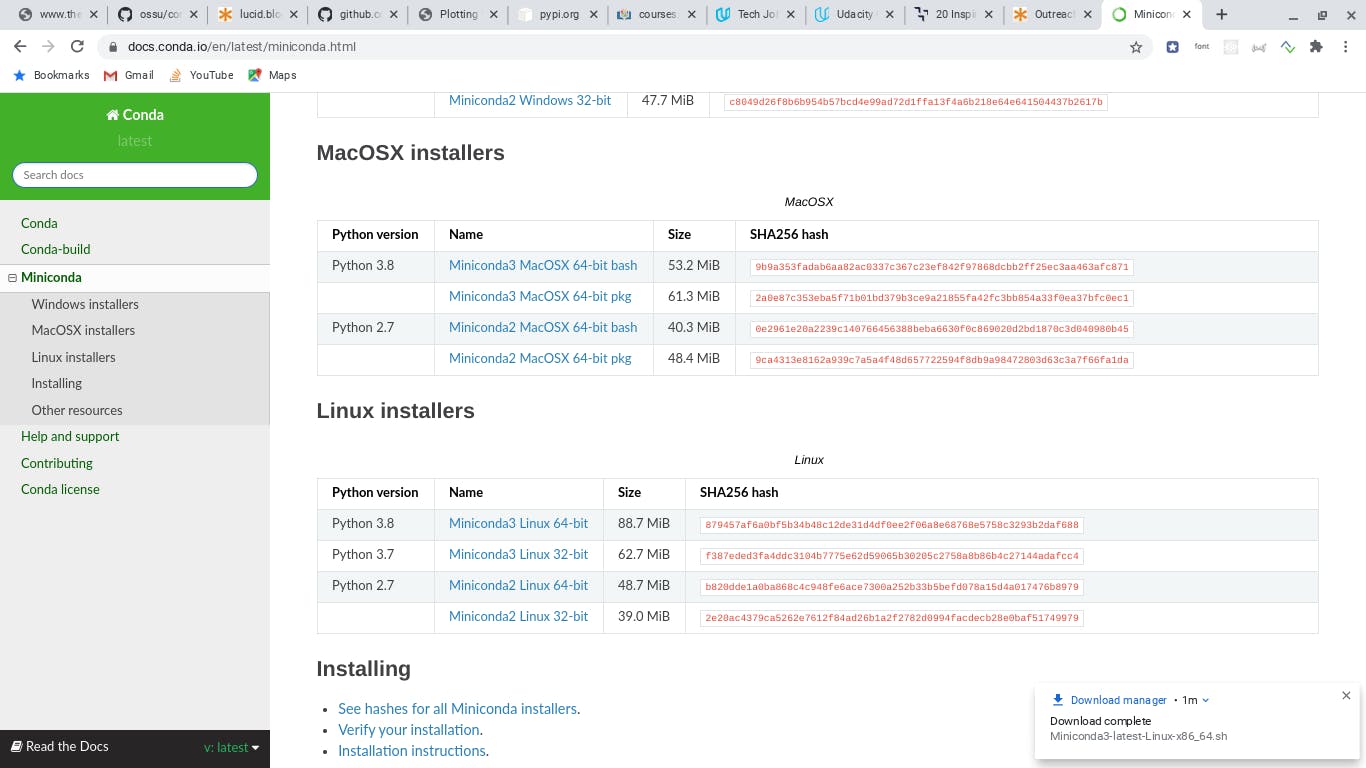
 Scroll down to Linux installers and select Miniconda3 Linux64-bit for python 3.8, download the file
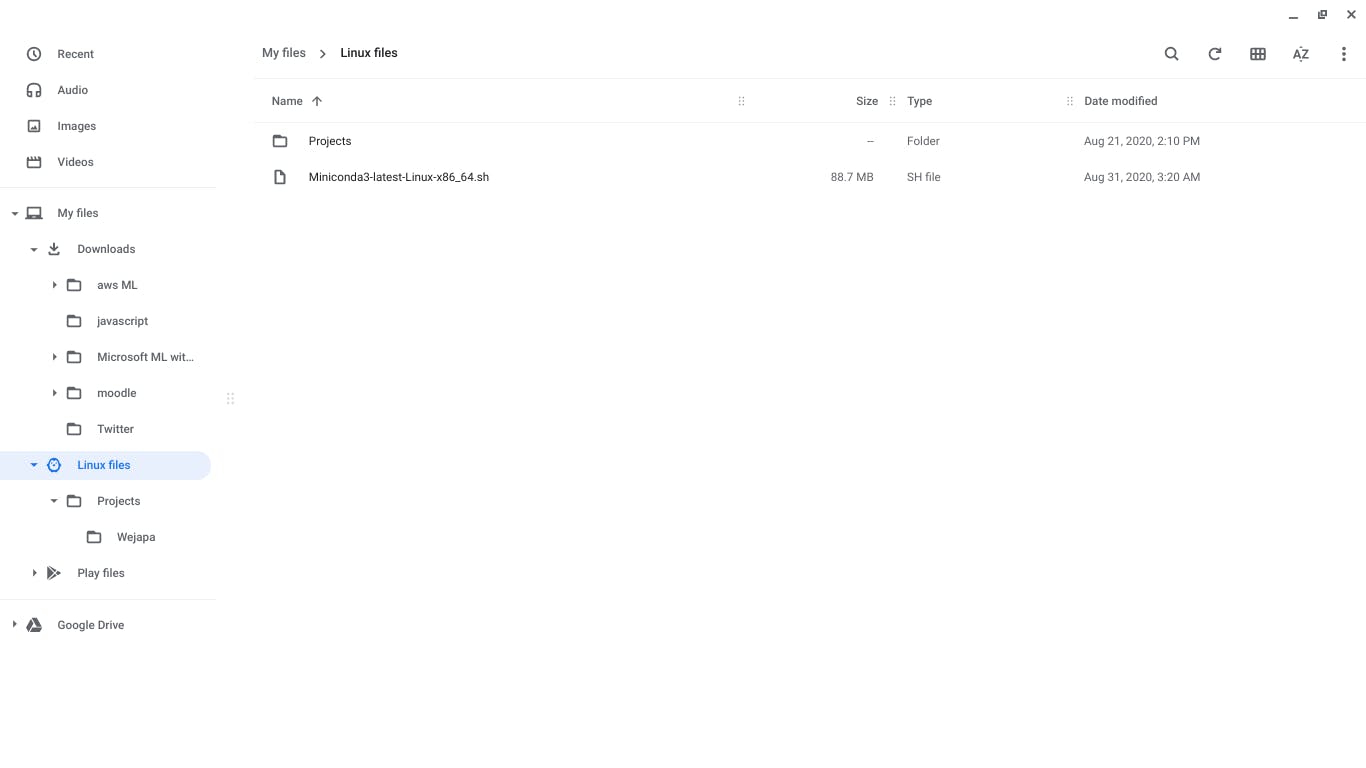
Open your files app from the dock and locate the downloaded file, click and drag the downloaded file to the Linux files tab on the left. The Linux files tab should be available after a successful installation of Linux(Beta) from the settings.
The file should appear in the Linux files folder by now.
Now the next thing to do is to fire up your terminal and run the command
ls -a
this lists all the files and folders in the current directory and you should be able to locate the downloaded 'miniconda.sh' file in my case 'Miniconda3-latest-Linux-x86_64.sh', yours might be quite different from this later in future but this is the latest version as at the time of writing this article.
To install the bash file, run
sudo bash Miniconda3-latest-Linux-x86_64.sh
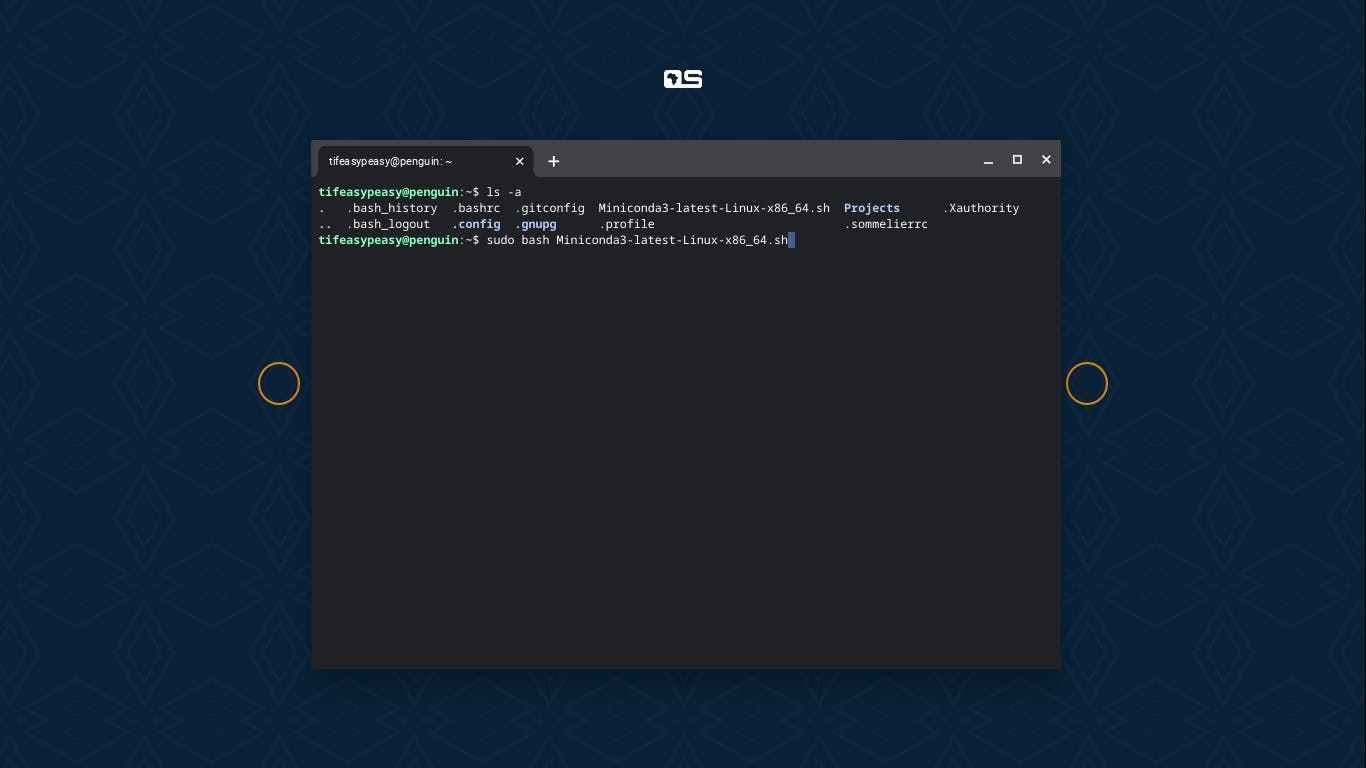
If you're familiar with Linux, you should understand the command but if not, what that command does is to install the bash file for us.
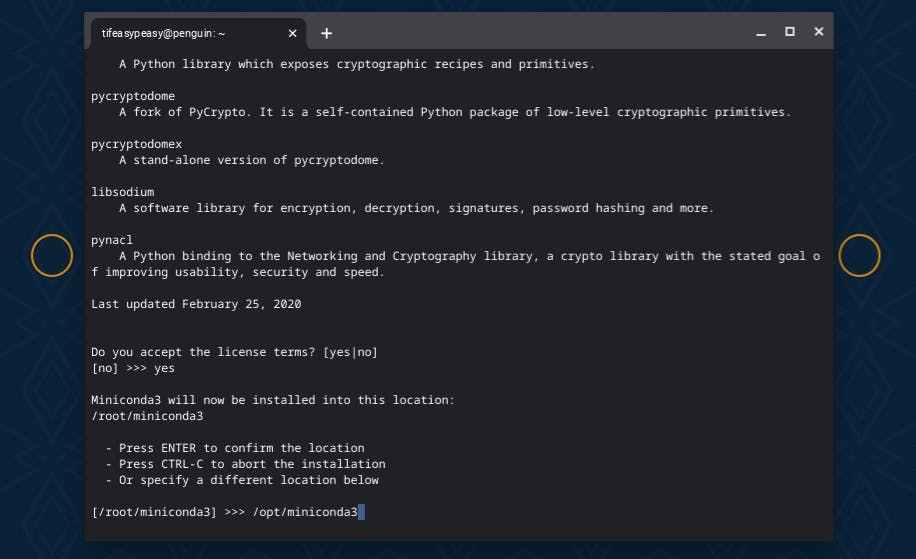
As the prompt implies, press enter to continue and by doing that a bunch of license agreement statement will pop up scroll down like i normally do hahaha until you get to see 'Do you accept the license terms?' and type in yes as usual.

After accepting the license agreement, a prompt would pop up asking you to confirm the location where Miniconda would be installed, for some reason i don't know i was having issues with the default location '/root/miniconda3' in setting permission for adding and removing packages and i found /opt/miniconda3 to work instead. So change the installation folder to /opt/miniconda3. The opt directory is quite common in Linux for unbundled packages
After the installation is finished, you should get the "Do you wish the installer to initialize MIniconda3 by running conda init ' type yes and click enter
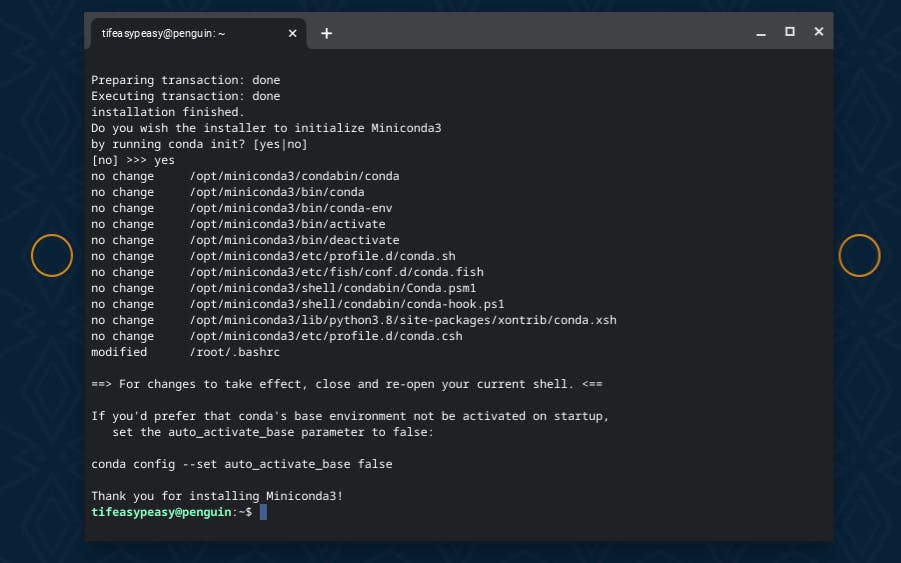
And thats it, for changes to take effect, close and reopen your terminal. You might want to run pip and conda commands but wait, there's still one more config left to do. Run the command below
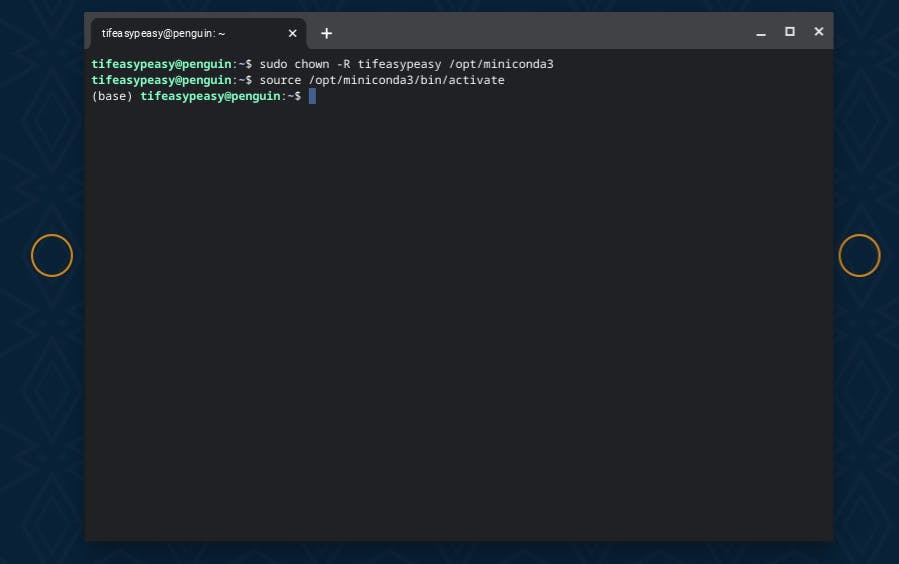
sudo chown -R yourusername /opt/miniconda3
What this does is to set permission for conda to access, add and remove packages that would be installed. yourusername in the command above is the name available in your terminal before the "@penguin". Run this command
source /opt/miniconda3/bin/activate
This command enters a base environment where you run python and conda commands, you'll require this each time in your terminal in order to run your conda and pip related commands.
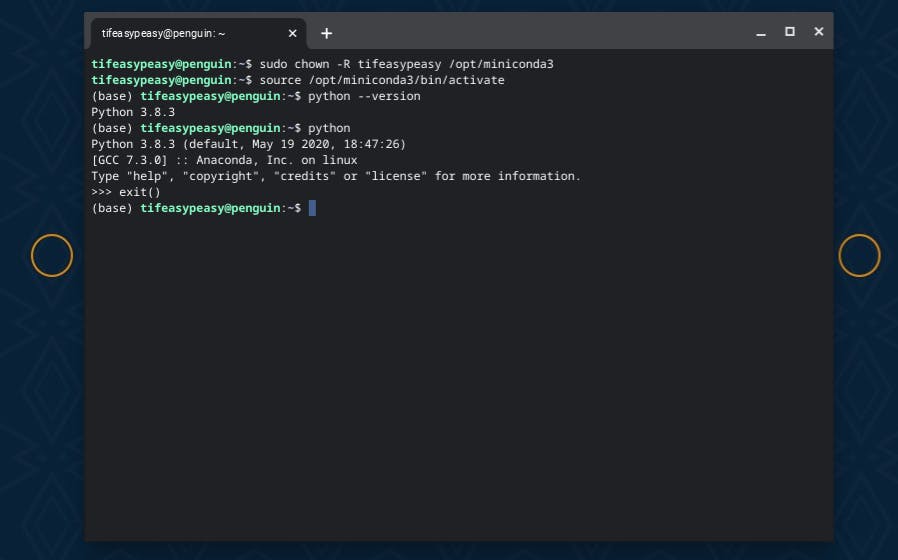
Run the command below to get the version of python
python --version
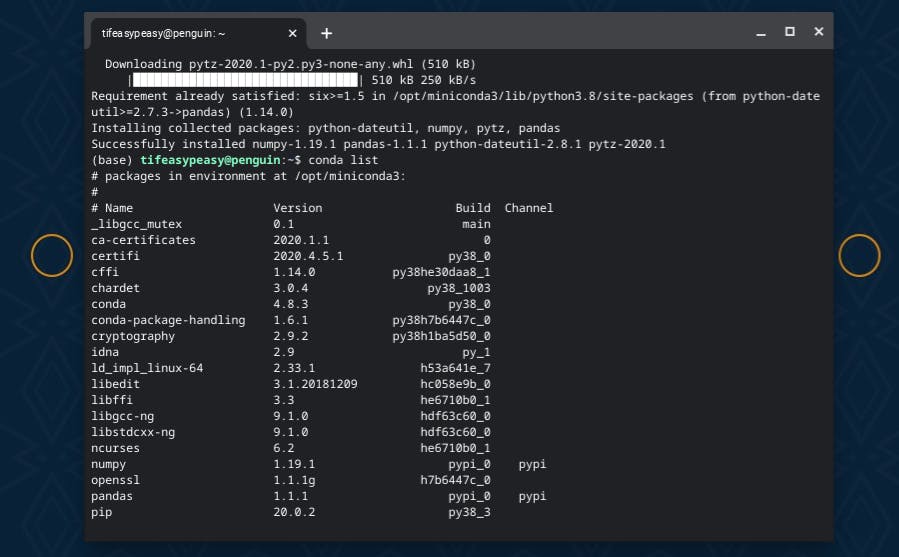
Running conda list gives us the list of installed packages and you could see those i installed from pypi using pip(numpy & pandas)
Now, let's install jupyterlab by typing
conda install jupyterlab
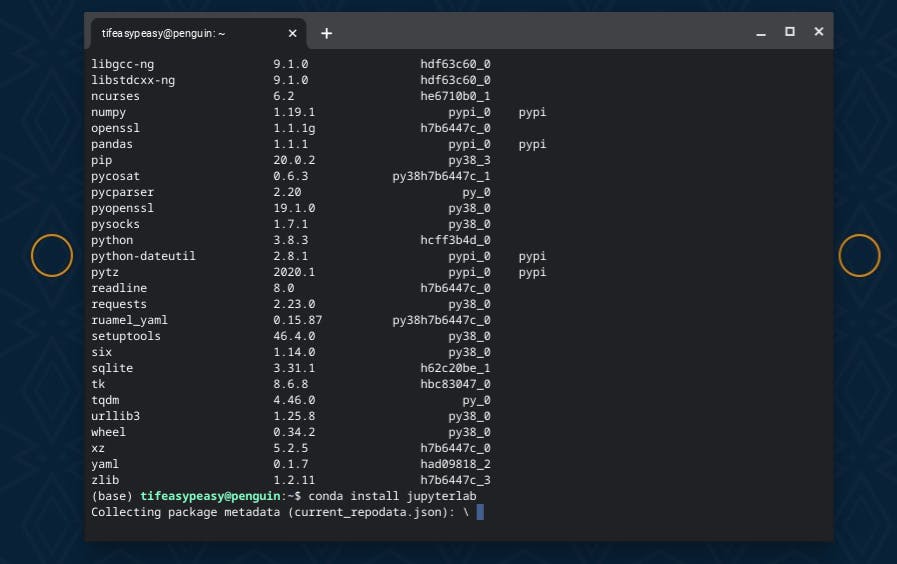
proceed by typing 'y'
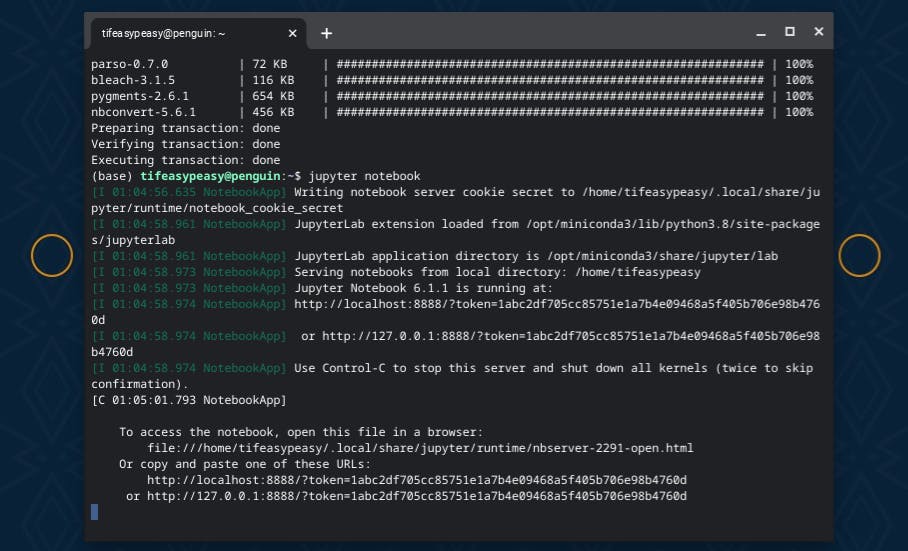
 After successful installation, run
jupyter notebook
Note: before running jupyter notebook, i already moved a notebook file to my Linux files folder in which i would use for a demo. Now you can start by creating a new notebook from the top right corner
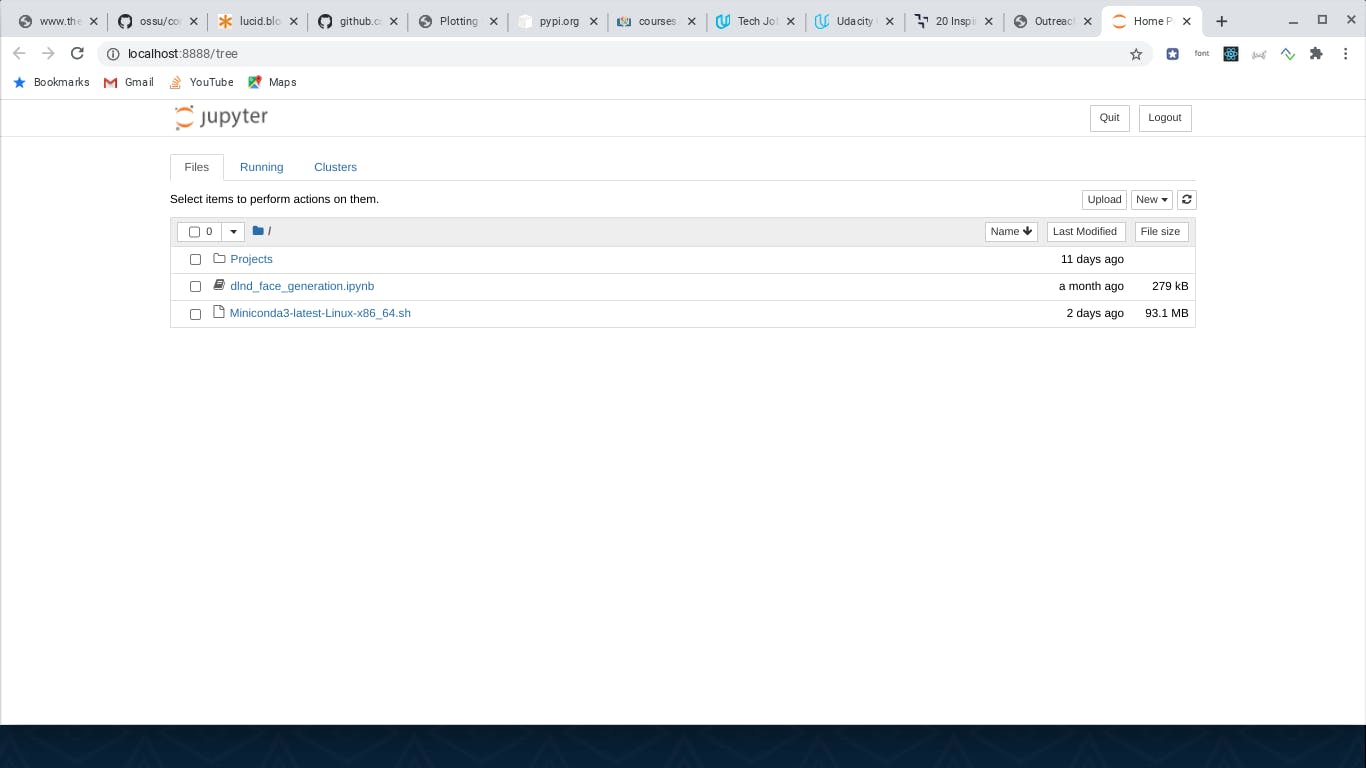
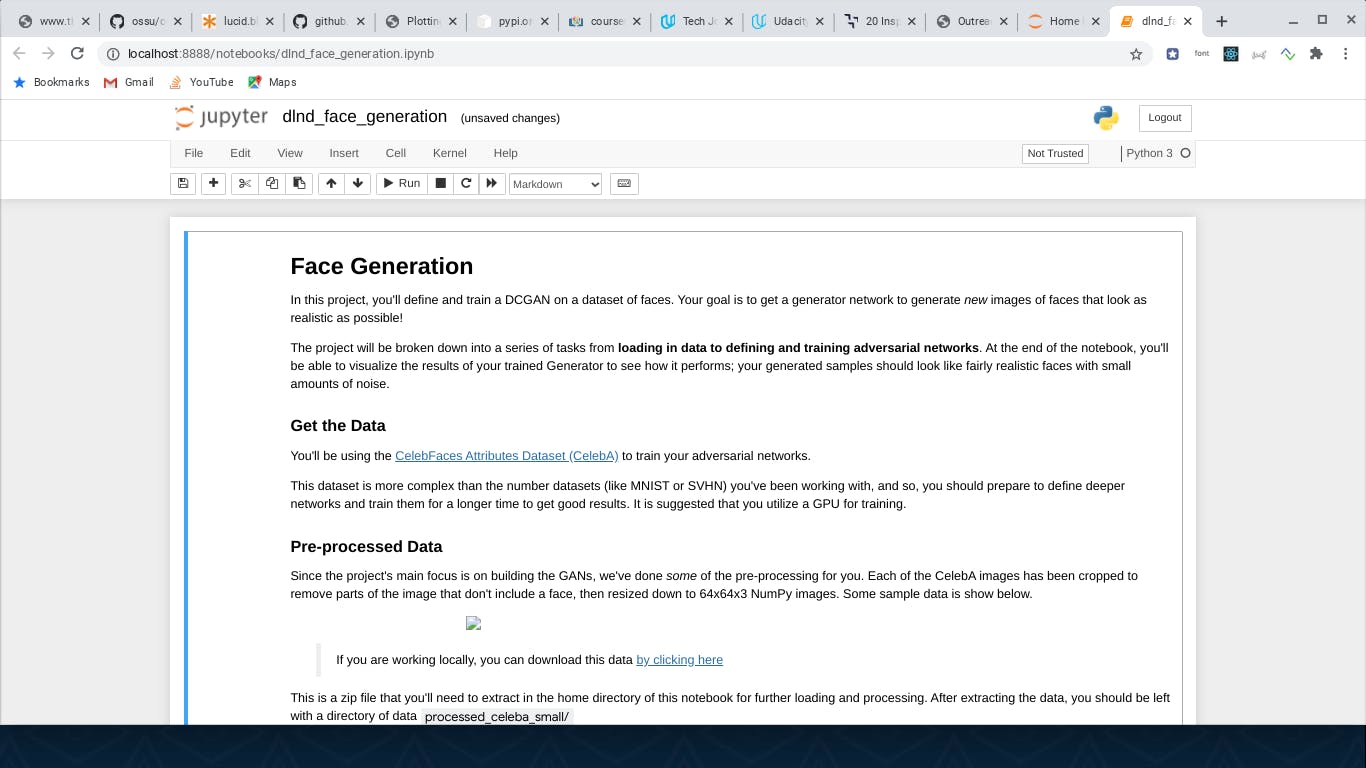
Voila✨ here is a notebook running inside of a chromebook
To stop a notebook, you can always select close and halt from the file menu or open up your terminal and type Ctrl+c to shutdown the notebook server
Uninstalling Miniconda
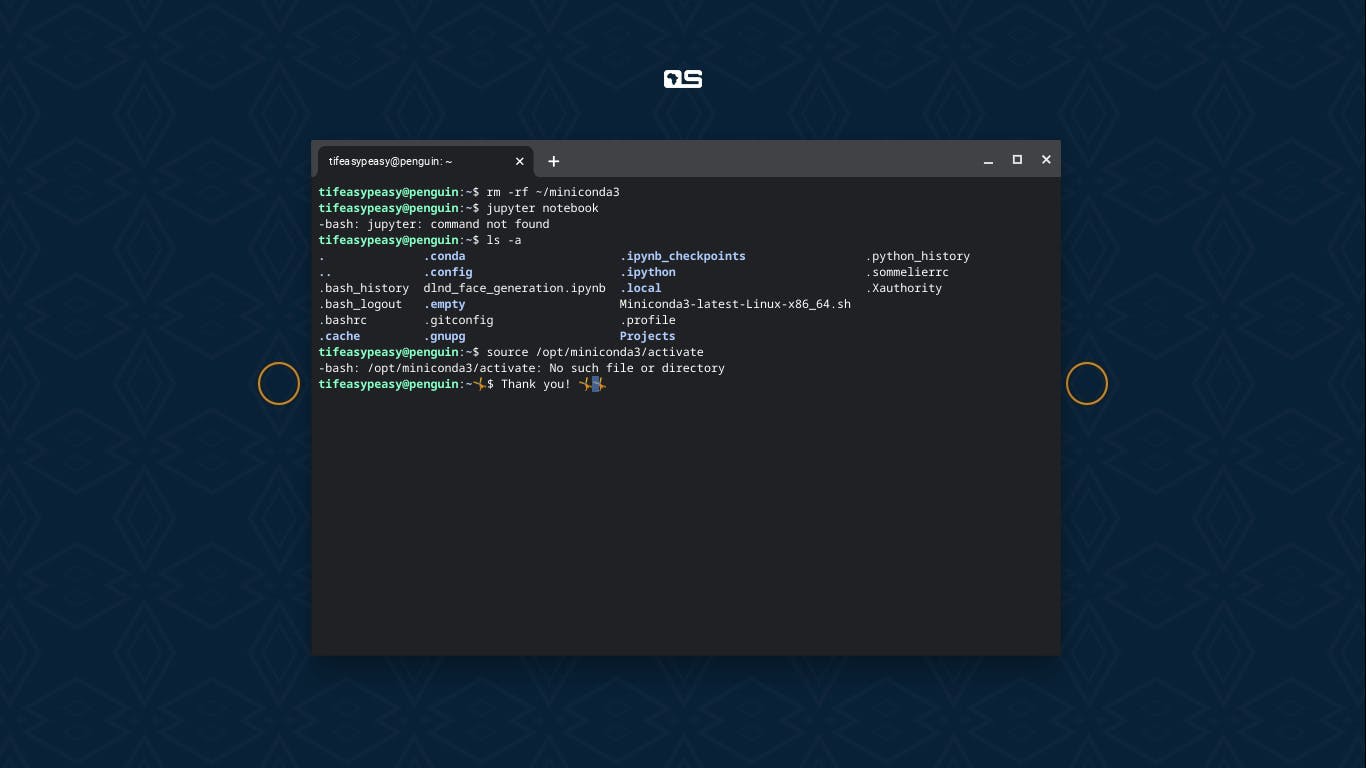
Just incase something goes wrong or you just don't want to use miniconda anymore, you can always uninstall using
rm -rf ~/miniconda3
And you can observe i couldn't get into a base environment by running source /opt/miniconda3/bin/activate anymore
Conclusion
If you got here, thanks for taking your time to read and i hope you learnt one or two things over the course of the article. Do well to share with your friends that might find this article helpful, may the force be with you 🙏 You can connect with me on LinkedIn here. Thanks to Rutik Wankhade for the article cover. Check out coverview.now.sh